Wednesday, July 30, 2008
Cherry Picking
We went cherry picking yesterday. Cherry season is my favorite time of year. I know, I know, I said strawberry season is my favorite time of year. I meant that, too. Please don’t make me pick.
Cherry picking in the Hood River Valley is so much fun. The drive is a little more than an hour, and we get to take in some great scenery along the way. The Columbia River Gorge and Mount Hood are beautiful in the summer, and the mountain air is sweet and refreshing. But, even if the trip wasn’t so nice, I would still go all that way for cherries.
I love cherries, but I do not love all cherries equally. I skip over the neon yellow and pink Rainiers and Royal Anns.
Sure, they’re pretty to look at, but their flavor has just one note—sweet. I’d rather fill up on Bings, Lamberts, and Lapins. And I’ll definitely take sour cherries, if I can find them.
The tree limbs above my head were so heavy with ripe, juicy fruit.
We got two big baskets to put our cherries into. My husband filled his right up.
My basket disappeared. Turns out I didn’t need it anyway, all the cherries I picked kept going directly into my mouth. But he knows it’s up to him to stock up, he’s the tall one. And also the fearless one.
I don’t really like climbing up on those big ladders.
My husband was also helpful this morning. While I prepared the other ingredients for our Cherry Aebleskiver breakfast, he pitted the cherries.
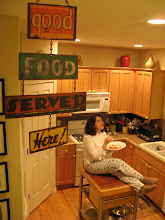
I just wish he didn’t do it wearing a white shirt.
Cherry Aebleskiver
Printable Recipe
1 ½ cups all-purpose flour
2 teaspoons baking powder
1 cup milk, at room temperature
3 room temperature large eggs, separated
8 tablespoons (1 stick) unsalted butter, melted, plus more for brushing the pan
2 tablespoons sugar
½ teaspoon vanilla extract
Pinch kosher salt
¾ pound cherries, pitted
Powdered sugar, for dusting
Combine the flour and baking powder in a large bowl. Combine the milk, egg yolks, butter, sugar, vanilla, and salt in a medium bowl and whisk until blended. Add the milk mixture to the flour mixture and stir just until smooth. Whip the egg whites to medium peaks and fold into the batter.
Heat an aebleskiver pan over medium-low until a drop of water sizzles. Brush each cavity with melted butter and drop in the batter by the tablespoonful.
Press 1 cherry into the center of each one.
Cook for about 2 minutes, or until golden brown. Turn with a small offset spatula or fork.
Cook another minute or two, or until golden brown and cooked through. Remove to a platter.
Make more aebleskiver with the remaining batter and cherries in the same manner, brushing the pan with melted butter between each batch. Dust with plenty of powdered sugar and serve immediately.
Serves 4. Best when served warm. The trick to making perfect aebleskiver is cooking them on the first side just until they’re golden brown on the surface but still runny in the center. As they are turned, the uncooked batter will flow into the pan, creating ball-shaped pancakes. Aebleskiver pans are available at most cookware stores. Aebleskiver, by the way, are traditionally made with apples.
Sunday, July 27, 2008
Salted Cabbage
We eat something in my family we call Salted Cabbage. At least that’s what we call it in Russian, it sounds a little funny when I translate it to English. It’s pretty much like sauerkraut but it’s less fermented and it has carrots in it. And since I just got a brand new pickling crock, I had to make some. Also, I finally got my hands on some elusive white cabbage. You can find green cabbage anywhere, but all of the cooks in my family warned me, you can only make salted cabbage with white cabbage.
This was my very first batch of Salted Cabbage. Well, I did make some a few months ago under the strict supervision of my mother, but that doesn’t count. This was my first batch by myself.
It turned out great, very crunchy and lightly sour. I can say that now. But the “aroma” in the pantry over the last few days, let’s just say it was not so great.
Salted Cabbage
Printable Recipe
3 ½ pounds shredded white cabbage
1 carrot, shredded
2 small bay leaves, lightly crushed
10 allspice berries
12 black peppercorns
2 ½ tablespoons kosher salt
Combine all of the ingredients in a large bowl. Mash with your hands, a sauerkraut stomper, or potato masher until the cabbage wilts and exudes juice. Transfer to a pickling crock, packing it in as tightly as possible. Apply a weight, making sure that all of the cabbage is completely submerged beneath the brine. Cover loosely and let ferment at room temperature for 4 to 6 days, or until the desired sourness.
Makes about 2 quarts. If, for some reason, mashing the cabbage with the salt does not create enough liquid to completely cover the cabbage once it’s packed into the crock, you can make additional brine. Simply boil some water, add kosher salt until it tastes slightly salty, and let cool. Add just enough to completely cover the cabbage. If any white matter appears on the surface during fermentation, do not be alarmed; it’s perfectly harmless yeast. Just skim it off. Fermentation time depends on the ambient temperature, so it may take 4 days in the summer and as long as 6 days in the winter. Keeps for weeks tightly sealed in the refrigerator. If you don’t have a pickling crock with a weight, use a glass or stoneware jar that’s large enough to accommodate the cabbage plus the bubbling of fermentation. Weigh the cabbage down with a plate topped with a tightly sealed jar filled with water. Look for white cabbage in Asian markets. Salted Cabbage is yummy straight up, and it’s great anywhere you might want a pickle, like on a sandwich or in potato salad.
Thursday, July 24, 2008
Green Tea Donuts
A new Korean market just opened in town (H Mart, 13600 SW Pacific Highway, Tigard, Oregon, 503-620-6120). I love exploring ethnic markets, browsing aisles stocked with unusual ingredients and trying to decipher the foreign labels, so I drove out there immediately. I’ve been three times now, the bakery’s green tea donuts are that good.
They’re subtly flavored with tea and black sesame, and they have a wonderfully chewy texture, from rice flour, I’m sure.
Though these green tea donuts are worth the long drive, I want the recipe so that I can make them myself.
I’ve spent more time than I care to admit searching for the green tea donut recipe. I’ve conducted an exhaustive internet search, and I’ve skimmed through every Korean cookbook at the book store, twice. I’ve turned up nothing.
So the last time I headed out to the Korean market, I was determined to win over the bakers with my charm and leave with the recipe and a few donuts. Or so I thought. Due to a bit of a language barrier and a certain unwillingness to divulge information, the closest thing I got was the owner impatiently jabbing his finger into a small sign that read, “Green Tea Donuts $1.50”. I couldn’t even convince him to tell me the Korean name of his tasty green tea donuts.
At least I got my donuts. And they sure tasted good. I will keep up my search, the recipe cannot elude me forever…
Labels:
Bakeries,
Donuts,
Korean food and drink,
Shops and markets,
Tea
Tuesday, July 22, 2008
Crock
A good pickle crock is hard to find. I tried every cookware store I could think of. When I asked, the salespeople just looked at me funny. Some of them didn’t even know what a pickle crock is. I even tried a few old-fashioned hardware stores, the kind that sell everything from wheelbarrows to canning jars, the kind you find in small agricultural communities. No luck. One helpful lady recommended I look at an antique store. But I don’t do antique stores.
I did find some German sauerkraut crocks on the internet, but they cost a small fortune. I’m not quite ready to spend a couple of hundred dollars on a crock. I mean, maybe I won’t really get into pickling. Maybe I’ll make one batch of pickles and lose interest. Not that anything like that’s ever happened before.
I was just about ready to give up on my search. I was starting to think up ways to justify the expense of the German crock. Then, as I was shopping at a Japanese market for sushi ingredients, I found exactly what I was looking for.
The Japanese may call it a tsukemono press, but I know a pickling crock when I see one. Now, some purists may balk at the fact that it’s made of plastic, not stoneware, but I figured it was cheap enough to give it a shot. My pickling crock came with detailed instructions printed right on its side and a hefty weight to keep the pickles submerged beneath the brine.
Now I need to figure out what kind of pickles I want to make first. I might try kimchee or sauerkraut or cucumber pickles, depending on what the market has in store for me next.
Sunday, July 20, 2008
Miles
We live a couple of thousand miles away from my parents and my brother and almost eight hundred miles away from my mother-in-law. They don’t usually make it over when I invite them to dinner. I’m so close with my family and yet so far.
I started Hungry Cravings to promote my forthcoming book Seared to Perfection. I started it to share my food stories and my recipes with whoever cared to read them. But what I didn’t realize when I started Hungry Cravings is that this blog would also become my way of sharing my cooking with family and friends when they can’t be here in person. It makes all those miles seem so much shorter.
Friday, July 18, 2008
Sun Jelly
I just couldn’t wait for the weekend to make the uncooked currant jelly. With the help of my husband, I harvested the black currants on a weeknight.
It was a tiny harvest, the currant shrub is only in its second year, but I figured it would be enough for a small batch. I pureed the currants, my husband went to bed.
The Red Currant Jelly—Jelled by the Sun recipe seemed so intriguing. And so easy. But I didn’t quite follow the recipe, seems like I never can quite follow a recipe. It called for red currants, I had black. It said to use cheesecloth, I used my trusty food mill…
The next morning, I put the jars of jelly outside. They basked in the warm sunshine all day long. The mixture of currant juice and sugar turned into jelly. Just like magic, amazing! I was very excited to see that it set perfectly. My husband was very amused that I was so excited about a few jars of jelly.
My fuschia jelly has a delicate texture and tastes like a mouthful of fresh currants, only better. It was delightful on a toasted and buttered English muffin, so much better than anything store-bought.
I cannot wait to taste it on crêpes.
Black Currant Sun Jelly
Printable Recipe
9 ounces black currants
9 ounces superfine sugar
Puree the currants in a food mill using the finest disc. If the puree has seeds, strain it through a fine mesh sieve to remove them. Stir in the sugar. Divide among 3 4-ounce jars, cover with parchment, and secure the parchment with butcher’s twine. Place the jars outside in the sun all day, or until jelled.
Makes about 1 ½ cups. Keeps for months tightly sealed in the refrigerator.
Labels:
Currants,
From the garden,
Jelly recipes,
Preserving
Wednesday, July 16, 2008
Gifts
I sent my dad homemade cookies for Father’s Day. I made three types—pecan sandies, chocolate-hazelnut cookies, and French macarons. I carefully wrapped each cookie and boxed them with an ice pack so that the ganache filling in the chocolate macarons wouldn’t melt. I mailed the cookies overnight. Mom was in on the surprise, she had to be home to receive the package. But she said, “You never send me cookies.”
That, I didn’t expect, “You don’t even like cookies. What kind of cookies do you like?” My mother is the only human on the planet Earth who dislikes cookies, and she especially dislikes chocolate chip cookies. “None,” she said. Now why would I send her cookies?
So I sent her three types of Pâte de Fruit for her birthday. I made raspberry, peach, and sour cherry. I had done some intelligence gathering about her favorite fruit flavors. As soon as she received the package, Mom called to say thank you and how much she liked the candy. She thought it was store-bought at first, she can be silly that way. Then she lectured me about how I shouldn’t spend money on her for overnight shipping.
Pâte de Fruit
Printable Recipe
¾ ounce pure apple pectin
1 pound 5 ¼ ounces sugar, plus more for coating
¼ teaspoon citric acid
1 pound 2 ounces fruit puree
4 ounces glucose
1/3 ounce Kirsch
Whisk together the pectin and 2 ¼ ounces of the sugar in a small bowl. Combine the citric acid and ¼ teaspoon of water in another small bowl and stir until dissolved.
Heat the fruit puree in a large saucepan to 105˚F. Whisk in the pectin mixture and bring to a boil, whisking constantly. Whisk in the glucose and the remaining 1 pound 3 ounces of sugar. Boil, stirring constantly with a heatproof spoon, until it reaches 224˚F. Stir in the citric acid mixture and Kirsch.
Immediately pour into a candy frame on a silpat or a silpat-lined quarter sheet pan.
Let cool for a couple of hours, or until firm. Invert onto a cutting board and cut into 1-inch squares.
A few at a time, transfer to a plate of sugar and turn to coat.
Shake off any excess sugar and enjoy!
Makes a whole lot of candy, about a couple of pounds. I prefer my candies tart, so I add citric acid to the coating sugar to taste. Keeps for a couple of weeks in a tightly sealed container in a cool, dry place. Apple pectin, glucose, and citric acid are available at L’Epicerie. (Both pure apple pectin and citric acid come in powdered form.)
Monday, July 14, 2008
Preserving Class
Our garden produces more than we know what to do with, and I always wanted to learn how to can and preserve the excess. I envisioned a pantry packed with homemade jams, jellies, pickles, tomato sauce, and salsa. But so far, all I’ve managed in two years was to cook and can a single batch of pepper jelly. It took me a while to muster the courage to do it, too, and the help of a friend with a bit of canning experience.
Canning always seemed like a tricky and mysterious business to me. Fears of invisible bugs and the food police were enough to dissuade me. I just wasn’t bold enough to try it without the guidance of an expert.
So yesterday I attended a day-long class at the Preserve. The “classroom” was nestled in a lush edible garden.
Our instructors were perfect opposites. One was an animated storyteller and comedian.
“When local and seasonal becomes something fancy, you know we went somewhere weird,” she did not hesitate to share her opinions. The other relied on recipe booklets and a flipchart.
She was the consummate home economist. Quite the pair, they had us giggling all day long. We learned the basics of jam making, pickling, and canning fruits and tomatoes. They demonstrated a batch of lemon verbena-infused strawberry-raspberry jam with homemade apple pectin and currant pectin, canned raw-packed apricots, canned plum tomatoes, and sauerkraut. They made it seem so easy.
I was just disappointed to learn that I can’t can my homemade salsas with a water bath canner. Either I have to follow a tested recipe in a book (yeah, right) or use a pressure canner. I wonder if they offer a class on pressure canning?
Today I bought four cases of canning jars. This weekend I think I’ll harvest our black currants and make the French uncooked jelly recipe. Turns out canning is pretty simple, I don’t know what I was so afraid of.
Labels:
Cooking classes,
From the garden,
Preserving,
Seasonal cooking
Saturday, July 12, 2008
Too Much
Now I have so much fruit I don’t know if we can eat it fast enough. So I’ve been dreaming up some yummy ways to make it keep. Like freezing it.
Peaches & Cream Popsicles
Printable Recipe
4 large peaches, peeled, pitted, and diced
½ cup crème fraîche
¼ cup sugar
½ teaspoon vanilla extract
Combine all of the ingredients in a food processor and pulse until smooth. Divide among 12 popsicle molds and insert handles. Freeze overnight, or until solid.
To unmold, run warm water over the mold for a few seconds and pop the popsicles out. Serve right away.
Makes 12 popsicles. Use juice cups and popsicle sticks if you don’t have popsicle molds. Also delicious with strawberries instead of peaches.
Labels:
Frozen dessert recipes,
Peaches,
Preserving,
Seasonal cooking
Friday, July 11, 2008
Fresno
We just got back from visiting my mother-in-law in Fresno, California. It was no accident we planned our trip for July. July is stone fruit season in Fresno.
Of course, I wanted to go to a u-pick orchard. I thought it would be easy to find one. There are so many u-pick options in Oregon, but I guess Fresno’s not the same. Or maybe we just didn’t know where to look. I searched the internet while my mother-in-law phoned her friends and family for leads. They sent us to visit the jam lady in Reedley, about half an hour south of Fresno. “Turn right past the river and go to the house at the top of the hill,” they said. At least it was something to go on.
It was the last day of our trip. After a beautiful drive through citrus and stone fruit orchards, we found the jam lady at the Top of the Hill Farm. She invited us in, it was like she was expecting us. The old farm house was cluttered with antique cookware and jars of jam in all of the colors of the rainbow. The jam lady offered to take us to see the pomegranate jelly being made. A private tour! I love to see where and how my food is made, but I usually have to tell my husband to create a distraction while I sneak into the kitchen.
I tasted every flavor of her jam until my teeth hurt. I picked out the Santa Rosa Plum Jam, Yellow Peach Jam, Three Berry Jam, Apricot Jam, Pomegranate Jelly, and Meyer Lemon Marmalade to take home with me.
(My belly was so full of jam, I almost skipped lunch. Almost, but not quite.)
Then I asked the jam lady where to go for u-pick fruit. She walked us right across her driveway and into her orchard.
One stop shopping, how convenient! Before I knew it we had an enormous box full of soft and juicy white peaches, nectarines, and plums.
My mother-in-law mentioned making a cobbler, and the thought stuck with me.
Stone Fruit Cobbler
Printable Recipe
2 large peaches, peeled, pitted, and cut into eighths
2 large nectarines, peeled, pitted, and cut into eighths
8 small plums, peeled, pitted, and quartered
¾ cup sugar
1 tablespoon freshly squeezed lemon juice
1 ½ tablespoons cornstarch
¼ teaspoon vanilla extract
8 tablespoons (1 stick) cold unsalted butter, diced, plus more for greasing the baking dish
¾ cup all-purpose flour
¾ teaspoon baking powder
½ teaspoon kosher salt
½ teaspoon cinnamon
Pinch freshly grated nutmeg
¼ cup heavy cream
Preheat the oven to 375ºF. Combine the peaches, nectarines, plums, ¼ cup of the sugar, lemon juice, cornstarch, and vanilla in a large bowl and toss to coat. Butter an 11×7-inch baking dish. Transfer the fruit mixture to the baking dish.
Combine the flour, baking powder, salt, cinnamon, nutmeg, and remaining ½ cup of sugar in a food processor and pulse a few times to combine. Add the butter and pulse until the mixture resembles coarse crumbs.
Add the cream and pulse until the dough just comes together.
Spread the crust mixture evenly over the fruit in the baking dish.
Bake for about 35 minutes, or until golden brown and bubbling around the edges. Let cool slightly and serve.
Makes enough for 6 or 8. Perfect with vanilla ice cream.
Wednesday, July 2, 2008
Smork
We moved to the Pacific Northwest from Texas. We found one main difference, aside from the rain, and it’s that there’s no real barbeque in Oregon or Washington, regardless of who says anything different. Now, someone who’s used to a regular diet of real Texas ’que can only last for so long without it. Then they do something entirely drastic, like mail order a serious smoker all the way from Texas, the kind that costs as much to ship as it does to buy since it’s so darned heavy. Even when they don’t know the first thing about smoke-cooking. Well, I guess when you live in Texas long enough and eat enough real Texas barbeque, you must inhale so much of that smoke that it just goes to your head, because that’s exactly what we did.
Luckily, it didn’t take us long before we had some tasty smoked pork coming off that serious smoker. And it didn’t take me too many margaritas before I was calling that smoked pork smork. I guess it’s got a good ring to it, because the name stuck.
Whenever we fire up the smoker, we load it up. Early in the morning, we throw on the pork butt, a brisket, and usually a chicken or two.
When the chickens are ready to come off, just in time for lunch, we put on the ribs. Sometimes, and only since it’s so abundant in this part of the country, we smoke a salmon fillet. Dinner’s a grand buffet, with glorious brisket.
Will you look at that beautiful smoke ring? And ribs that would bring a tear to your eye.
And, of course, plenty of fork-tender, melt-in-your-mouth smork.
We eat it all with spicy barbeque sauce and potato salad and coleslaw. Sometimes I actually wish we had gotten a bigger smorker. Oh, I mean smoker.
Smoked Pork Butt
Printable Recipe
1 7 ½-pound bone-in pork butt
Kosher salt
¼ cup Lucy’s Chile Rub
Season the pork generously with salt and coat with the rub.
Cover with plastic wrap and refrigerate overnight.
Fire up the smoker and let the fire burn down to coals. When the temperature falls to 250˚F, place the pork, fat side up, in the smoker as far from the fire as possible. Smoke the pork, maintaining the temperature between 225˚ and 250˚F and rotating the pork once half way through the cooking time, for about 10 to 11 hours, or until fork tender. The meat will shrink away from the bone and a meat thermometer will register 185ºF when it is cooked through.
Remove the pork to a platter, tent with foil to keep warm, and allow to rest for about half an hour. Shred the pork using a fork and serve immediately.
Makes enough to feed a small army. Serve with your favorite barbeque sauce. You can pile it on a bun for the best pulled pork sandwiches ever. We use about 10 pounds of natural hardwood lump charcoal and 3 pounds of wood, a combination of mesquite and oak, to keep our smoker going for about 10 hours. If you don’t happen to own a smoker, use smoked salt instead of kosher salt, and roast the pork butt in a 250˚ oven—it’ll be almost as good.
Tuesday, July 1, 2008
Berry Picking
We drove out so Sauvie Island for the second weekend in a row, crossing our fingers for ripe and ready-to-pick strawberries.
The berries weren’t quite ripe last weekend. In a good year, the bushes are so heavy with fruit, you don’t know where to start picking. The strawberries practically jump into your mouth, they’re so irresistible, and you just can’t stop eating. Their fragrance is intoxicating. The strawberries are warm from the sun and sweet like sugar and so juicy. The juices stain your lips. Last year was one of the best in recent memory.
U-pick strawberries are about a dollar a pound. My husband likes to say they should weigh us before and after we go into the field, because for every berry that goes into the bucket, we eat two or three. But they haven’t caught on yet.
I can hardly wait for strawberry season every year. We usually make it home with about twenty pounds of fresh berries. This year I planned on making strawberry ice cream and popsicles, strawberry shortcakes, chocolate-dipped strawberries, strawberry charlottes, lavender-strawberry verrines, strawberry lemonade, frozen strawberry soufflés, strawberry panna cottas, and a strawberry tart, to name a few.
But this wasn’t such a good year for strawberries. And by the time we got to the field, they had been picked over. The strawberries didn’t taste like sugar. They were resistible, I didn’t feel an uncontrollable desire to eat every last one of them. We only picked a couple of pounds.
Just enough to make strawberry mousse cakelettes.
It turns out that a bad season for strawberries can be a good season for raspberries. And lucky for us, the farm we go to has both. We came upon the raspberries quite by accident, as we wandered around wondering what to do about our meager strawberry harvest. These were the best, most aromatic raspberries I’ve ever tasted. So we picked lots.
Behold, my strawberry tart turned into a raspberry tart.
Raspberry Tart
Printable Recipe
1 ¾ teaspoons gelatin
1 cup heavy cream
1 large egg yolk
¼ cup sugar
½ teaspoon vanilla extract
4 ounces mascarpone, softened
1 fully baked 9-inch Pâte Sucrée Tart Crust
1 ¼ pound raspberries
2 tablespoons Chambord
3 tablespoons seedless raspberry jam
Measure 1 tablespoon of water into a small bowl and slowly sprinkle over ½ teaspoon of the gelatin. Heat ½ cup of the heavy cream to a simmer in a small saucepan. Whisk together the yolk and 2 tablespoons of the sugar in a small bowl. Continue whisking while adding the hot cream in a thin stream. Transfer the mixture back to the saucepan and cook, stirring constantly, over low heat for about 5 minutes, or until it reaches 160˚F and thickens. Stir the gelatin and vanilla into the cream mixture and strain through a fine mesh sieve. Let cool to room temperature. Stir the cream mixture into the mascarpone, a little at a time. Chill over an ice bath until just beginning to thicken. Transfer to the tart crust and refrigerate for about an hour, or until set.
Puree 8 ounces of the raspberries in a food mill using the finest disc. If the puree has seeds, strain it through a fine mesh sieve to remove them. Stir in the remaining 2 tablespoons of sugar. Slowly sprinkle the remaining 1 ¼ teaspoons of gelatin over the Chambord. Place the bowl of the gelatin mixture over a small pan of simmering water and heat until melted. Stir into the raspberry mixture. Whip the remaining ½ cup of cream to stiff peaks. Stir 1/3 of the cream into the raspberry mixture, then fold in the remaining cream. Transfer to the tart crust and refrigerate for about an hour, or until set.
Arrange the remaining 12 ounces of raspberries atop the tart in a decorative pattern. Combine the jam and 2 tablespoons water in a small saucepan and heat until melted. Lightly brush the raspberries with the hot jam mixture. Cut the tart into portions and serve immediately.
Makes 1 9-inch tart, serving 8.
Labels:
Raspberries,
Seasonal cooking,
Strawberries,
Tart recipes,
Tarts,
U-pick